
Preview Environments
Boot a per-ticket preview — a live shop from your repo and a database snapshot — and watch the AI agent's changes right inside the ticket.
A preview is a live, per-ticket environment you can boot on demand: Spedy clones your project's repository, restores a database snapshot, and starts the application (e.g. Shopware or Magento). You see the running shop in an iframe next to the ticket — and it's where the AI coding agent makes its changes.
How it works
When you open a ticket and start its preview, Spedy boots a container stack that:
- clones the project's preview repo,
- restores a database snapshot, and
- starts the application.
Each ticket has exactly one preview. The preview URL is unique to your organization and only reachable with a valid Spedy session — see Security & isolation.
Bringing your own stack? If your repo ships its own
docker-compose.ymlinstead of using a Shopware/Magento template, see Preview Config (BYOC) for the.spedy/preview.ymlfile that tells Spedy which service and port to route.
Prerequisites
Preview Environments are a Beta feature that must be activated in two steps:
- Organization: An admin enables "Live Preview" under Settings → Features (marked with a "Beta" badge).
- Board: Each board must then opt in individually under Board Settings → Features.
Without both toggles, the Preview button in the ticket header is not visible and the preview page shows a notice with instructions for enabling it.
Additionally, your organization needs an active GitHub integration under Settings → Integrations. Without it, the repository section shows a hint instead of the repo picker.
Set up a project
Open Project → Settings → Preview.
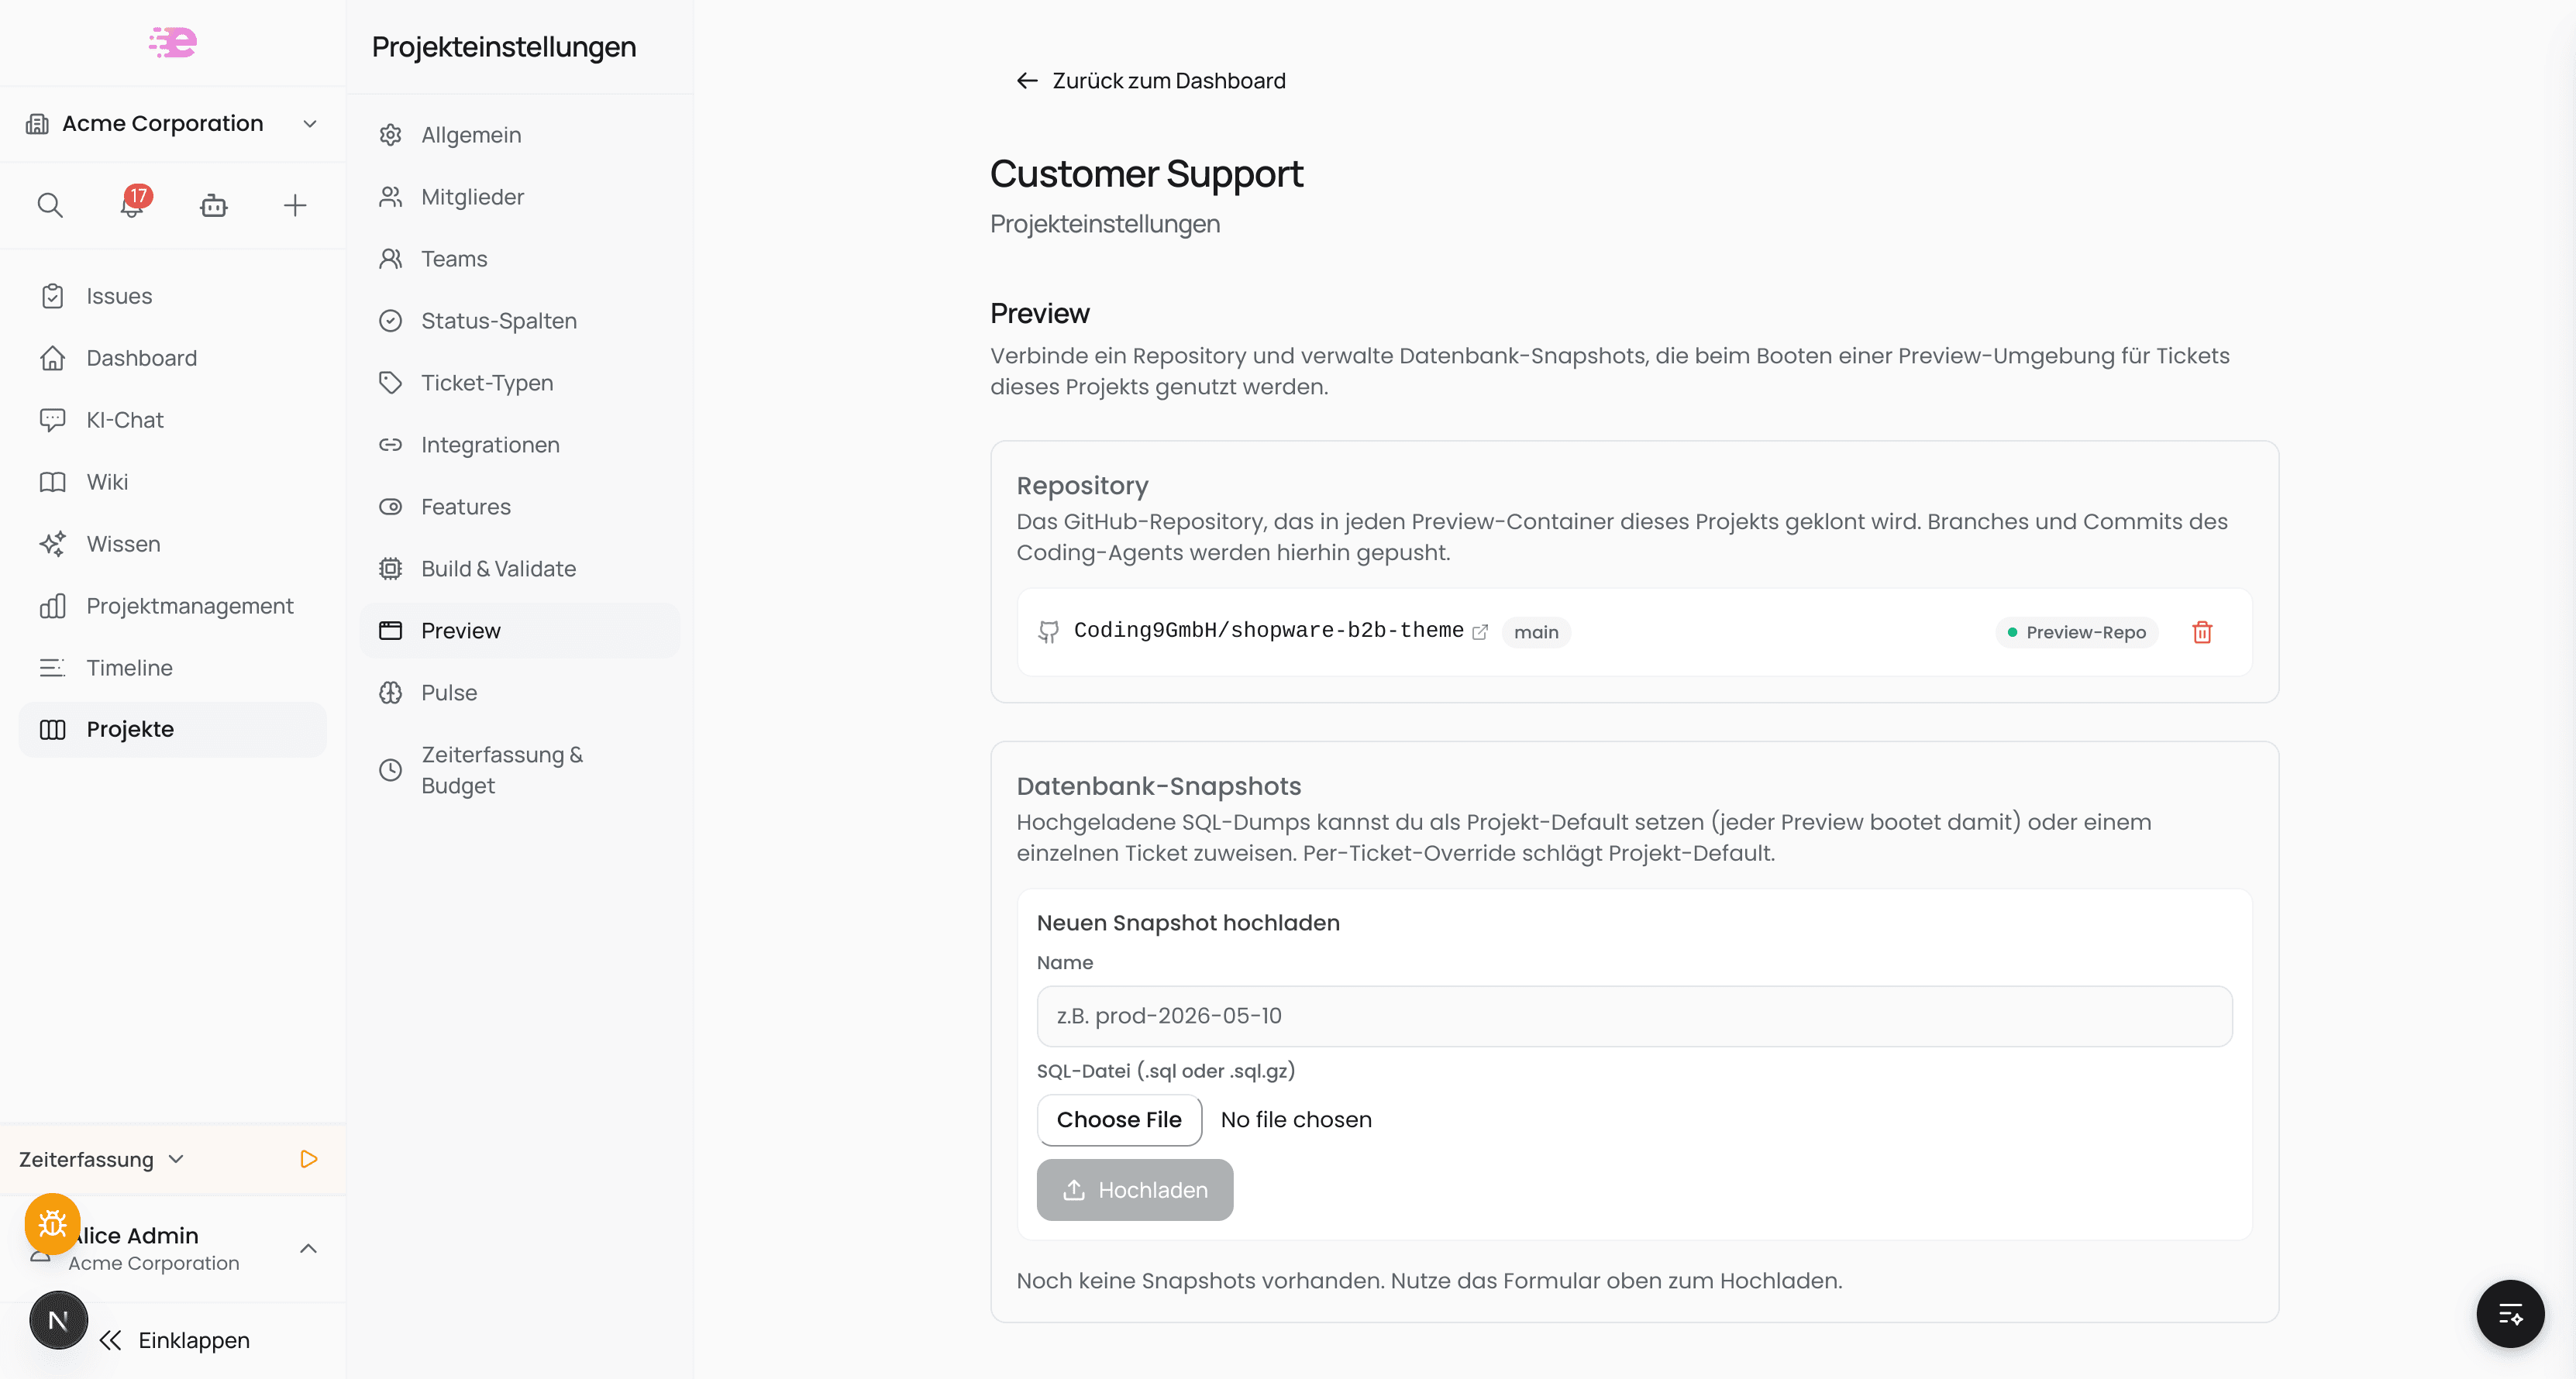
Connect a repository
In the Repository section:
- Click Connect repo and pick a GitHub repository from the dropdown (the list comes from your organization's GitHub integration).
- Confirm the base branch (pre-filled from the repo).
- Click Connect.
The freshly connected repo is automatically marked as the preview repo (green badge). A board can have several repositories (e.g. for the runner or CI) — but exactly one is the preview repo. Use Use for preview to move the marker to a different repo.
The preview container clones this repo on every boot. Branches and commits made by the AI agent are pushed here.
Upload a database snapshot
Without a snapshot, a fresh preview boots with the empty demo database. For realistic data, use the Database snapshots section:
- Give it a name (e.g.
prod-baseline). - Choose a
.sqlor.sql.gzdump (up to 4 GB). - Click Upload.
- On the entry, click Set as default → it gets a green Project default badge.
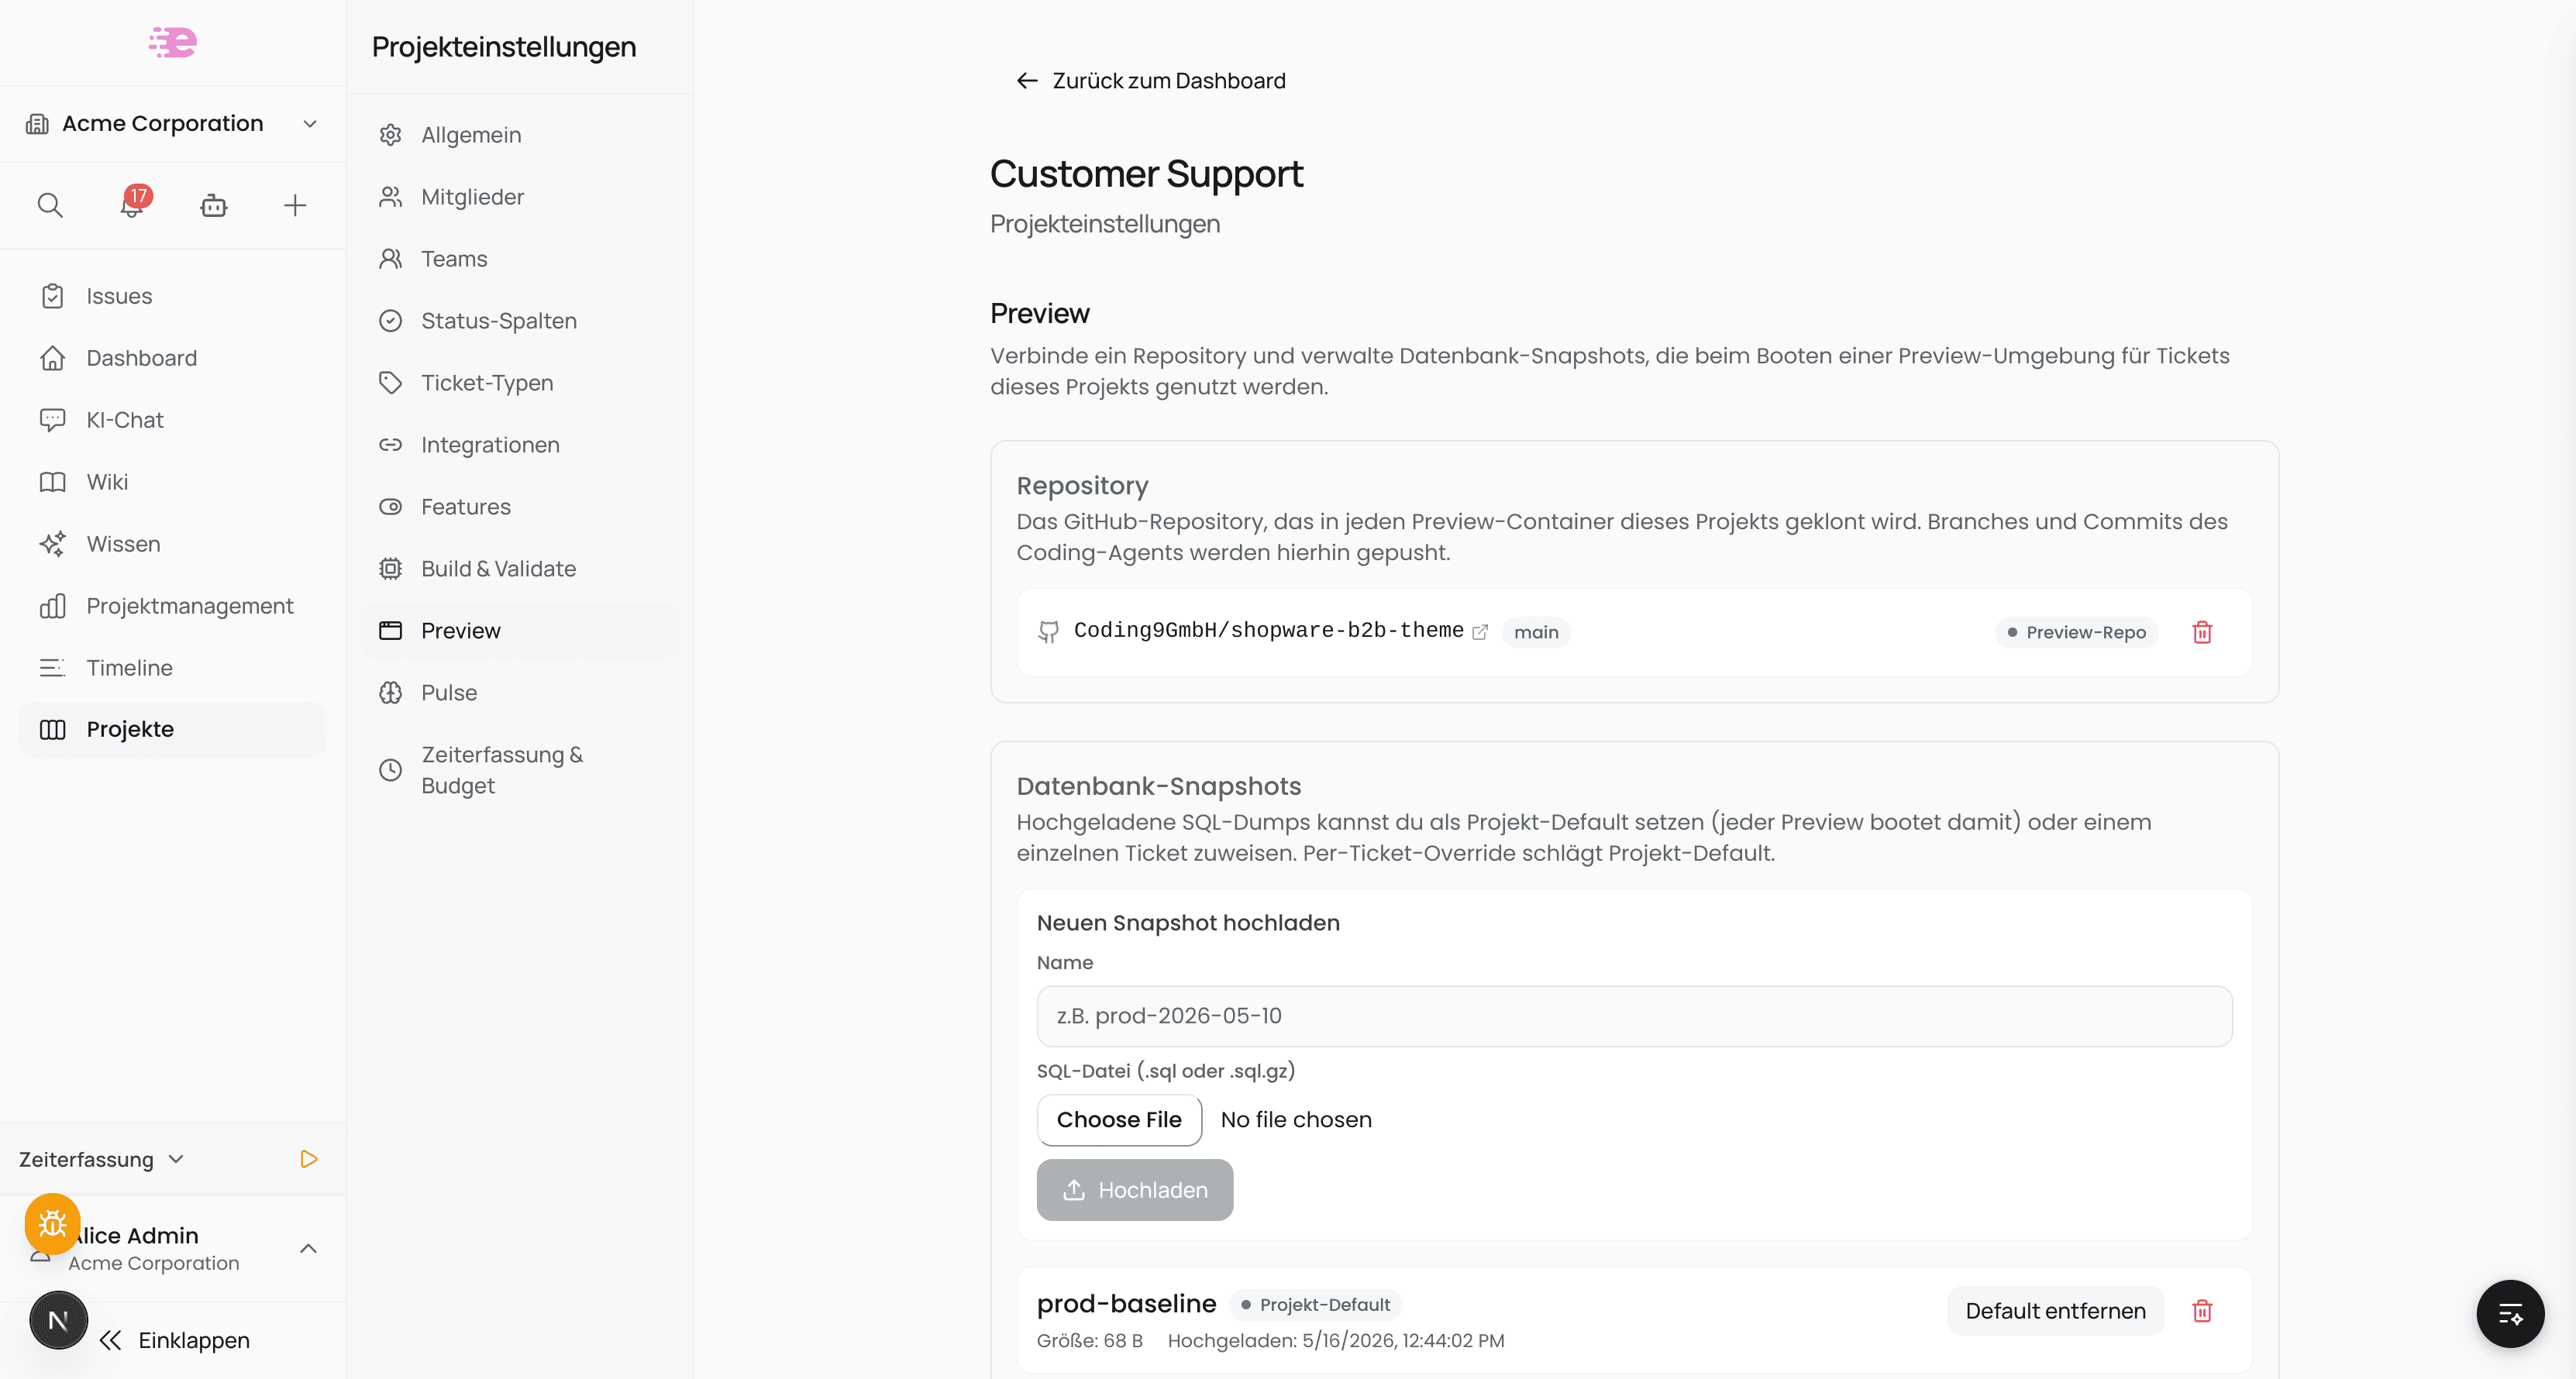
The project default is restored into every preview of the project. You can override it per ticket — see Override the database per ticket.
Use the preview in a ticket
Click the preview icon in the ticket header (or open …/tickets/<id>/preview directly). The first time, it shows "Preview is off" — click Start preview. The first boot takes ~30–60 s (container start + repo clone + snapshot restore); after that it's seconds.
Once it's up, the left half shows the shop in an iframe, the right half the ticket panel and agent:
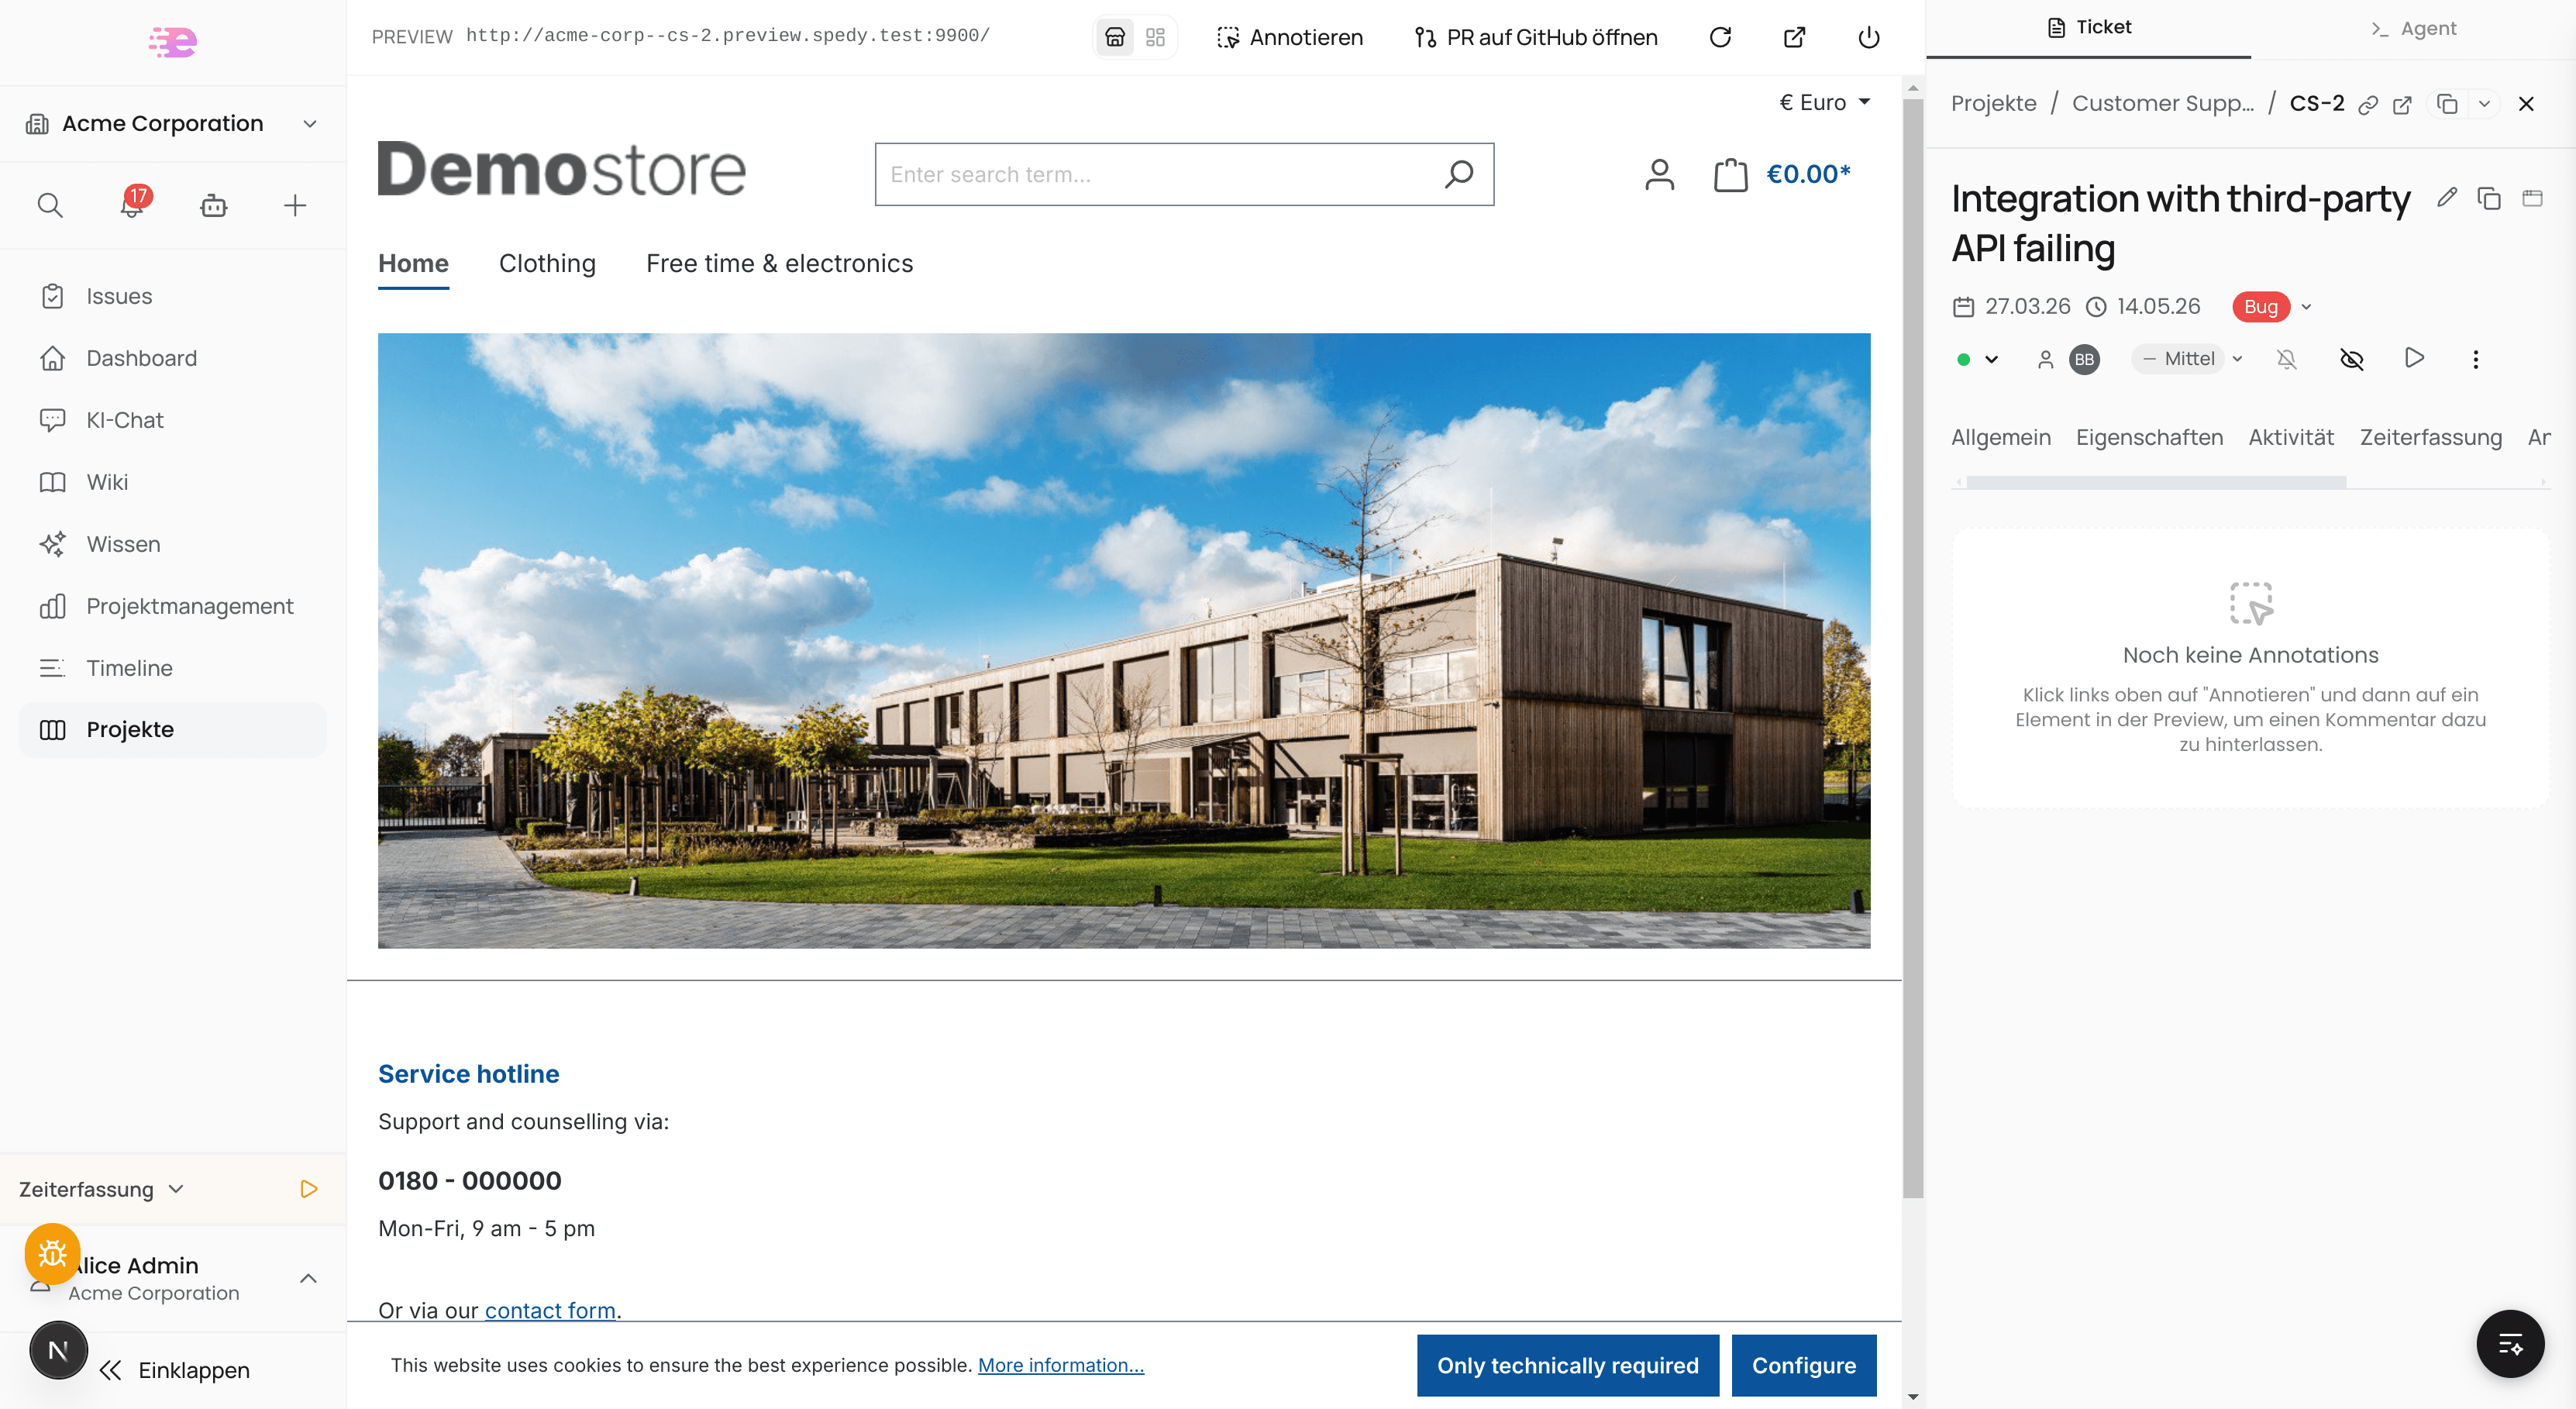
Pick a branch or PR
By default, the preview clones the preview repo's default branch. On the start card (while the preview is stopped) you'll find a searchable branch dropdown that lets you boot a different state instead:
- Default branch — the preset; if you don't pick anything, the existing behavior is unchanged.
- The ticket's branches and pull requests — every branch and PR linked to the ticket (for example, the branch the AI agent worked on).
Pick the branch behind an open PR and click Start preview — the preview boots exactly the code under review. The selection applies to this boot; a later Reset rebuilds the preview on the same branch.
Stopping a preview
A started preview keeps running until you stop it — closing the preview tab does not shut it down. Stop it with the power button in the preview toolbar, or from the running-previews list on the dashboard / board header. Stopping frees the runner for other previews, so stop one when you're done with it.
Override the database per ticket
To boot a specific ticket against a different dump (for example, to reproduce a customer-specific bug), open the ticket → Properties tab → Preview DB field.
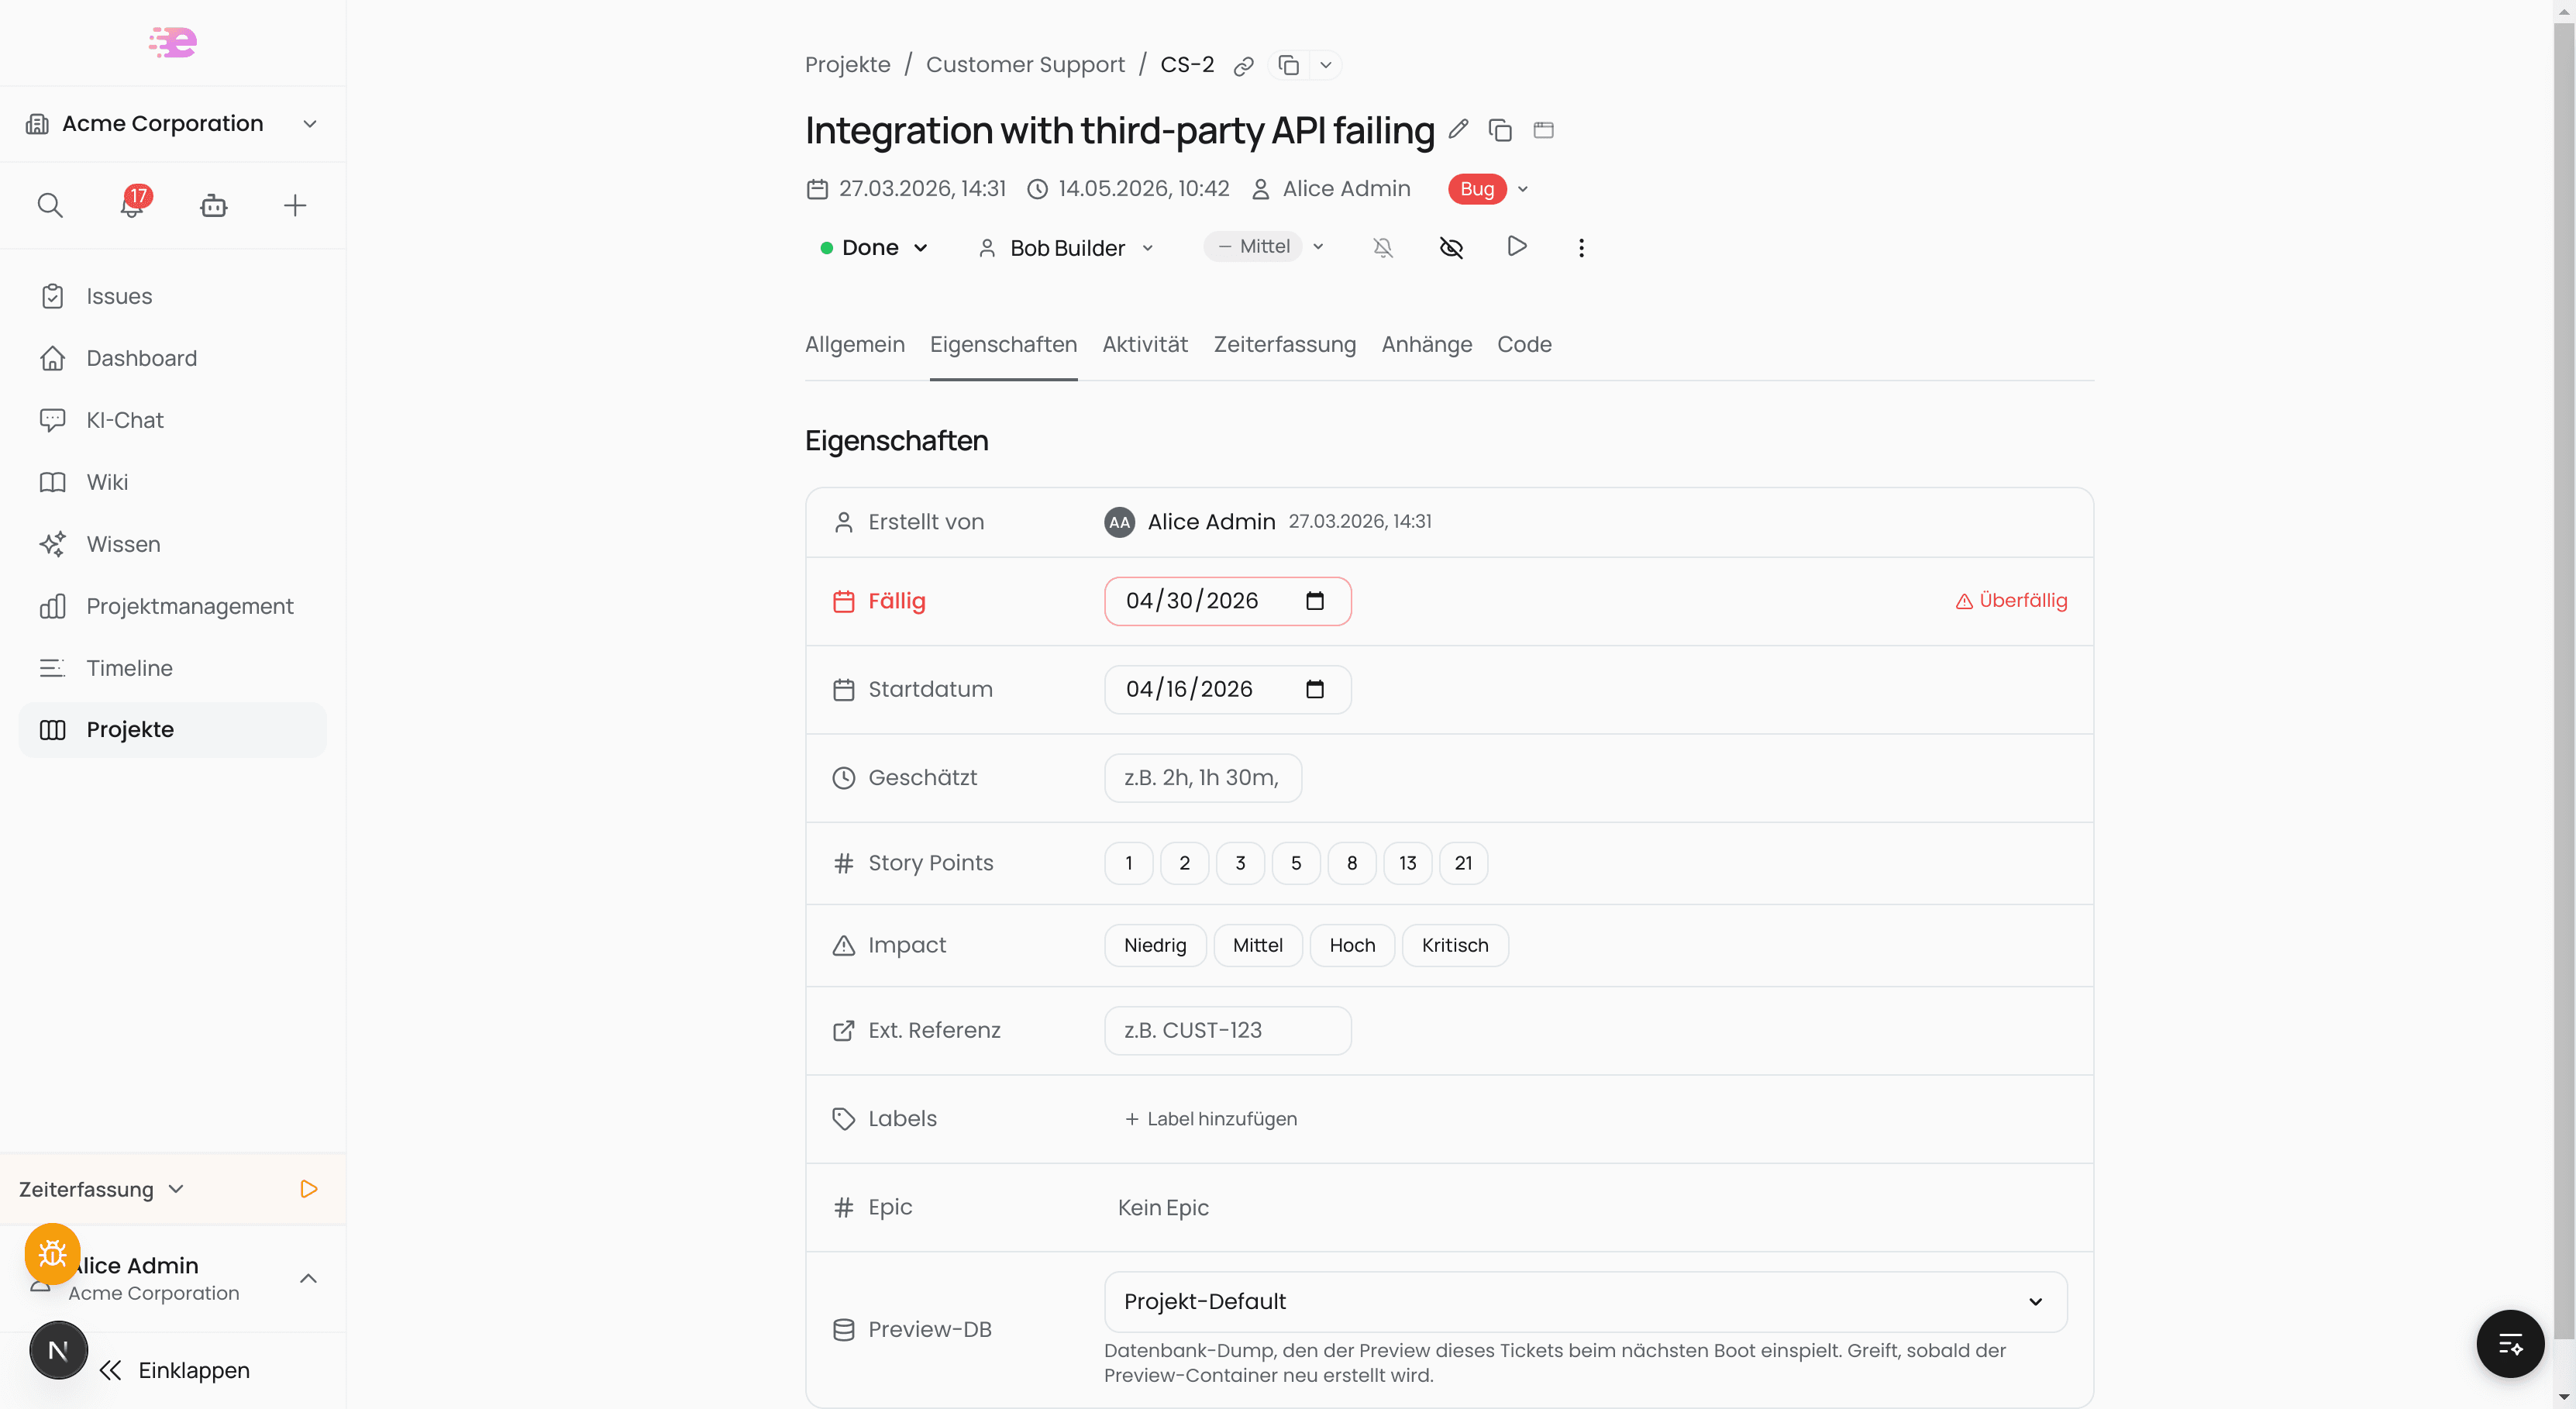
Resolution order at boot (highest priority first):
- Per-ticket override (this field)
- Project default (see above)
- Template seed (the image's own demo database — e.g. dockware's for Shopware)
The selection takes effect on the next container boot — a running preview keeps its database until it restarts.
Control the preview agent
The AI coding agent works directly in the preview. What it's allowed to do is up to you, per project: open Project → Settings → Agent Setup and scroll to the Preview Agent section. Anyone who can manage runners can edit these settings — everyone else sees them read-only.
Permissions
The Permissions card has three areas:
-
Create pull request automatically (default: on) — After every successful run, Spedy commits and pushes the agent's changes and automatically opens a pull request. If a PR already exists for the branch, it's reused and linked in the ticket. Turn the toggle off to create PRs manually via the Create PR button in the ticket, as before.
-
Preview & container access — Three toggles control how the agent may verify its own changes:
- Fetch the live preview over HTTP (
preview_fetch) — the agent can call the running preview and inspect the response. - Run commands in the preview containers (
preview_exec) — e.g. a test run or a build command. - Read container logs (
preview_logs) — to get to the bottom of errors.
All three are on by default. Access runs through a hardened per-run gateway: no shell access, no Git credentials, and every call is logged.
- Fetch the live preview over HTTP (
-
Restrict tools — By default, the agent may read and edit files. Enable the toggle to define the allowed tool set explicitly; you then pick tools (read, edit, search, web research, and more) individually via checkboxes. A shell (Bash) is never on the list — commands in the preview are defined as pre-/post-run commands instead (see below).
Preview media (screenshots & video)
In the Preview media card, you decide whether the agent captures the running preview after its run and attaches the result to the pull request and ticket. Both toggles are off by default — captures cost run time, so you turn them on deliberately.
- Capture screenshots — After each agent run, the views declared in
.spedy/preview.ymlare shot. The images are embedded directly in the PR body and posted as a comment on the ticket. - Record a short video — Additionally encodes a short walk-through clip of the routes. It requires screenshots (the toggle is disabled while capture is off). Since GitHub doesn't inline video, the clip appears as a link.
Two things happen automatically when capture is on:
- Before/after of flagged spots. If reviewers left image annotations on the ticket, exactly those routes are re-captured after the agent's fix — so you see the criticised pages side by side.
- Annotatable screenshots. The captured images land as real comment attachments, so you can drop new annotations right onto the agent's screenshot instead of only viewing it.
Pre- and post-run commands
Below the permissions you'll find two cards for commands the runner executes in the preview containers around every agent run:
- Pre-run commands run before the agent — e.g.
npm cito install dependencies, or a seed script. If a pre-run command fails, the run aborts before the agent starts. - Post-run commands run after the agent — e.g.
bin/console theme:compile && bin/console cache:clearso the change becomes visible in the preview. A failure here only produces a warning; the run still counts as successful.
To add a command:
- Optionally enter a compose service on the left (empty = your preview's primary container).
- Enter the command, e.g.
npm ci. - Click Add.
Each command can be disabled via its toggle without deleting it, and removed via the X. Commands have a default timeout of 5 minutes; up to 20 active commands are allowed per phase.
Note: If the project has a runner team assigned, the system prompt of its first active stage (including assigned skills) also applies to preview runs — the agent behaves in the preview exactly as it does for runner jobs.
Security & isolation
- Organization isolation. Each preview gets an org-unique slug, so two organizations never collide — even with the same board prefix. Every request to a preview is checked against the caller's organization.
- Session-gated. The preview URL is only reachable with a valid Spedy session and only for your own organization.
- Private repos. Cloning private repositories uses your organization's connected GitHub credentials.
Address bar and navigation
The preview view behaves like a browser: the address bar shows the current URL and supports navigation via Enter or the refresh button. When navigating within a running preview, a thin progress bar and an address bar spinner appear — instead of the full boot overlay.
The boot overlay only appears for genuine container states (cold boot, stopping, error).
Stopping and status
Stop while booting
You can stop a preview at any time — even while it's still starting up. The stop button is available in both the boot overlay and the toolbar.
Status indicator on the ticket
The ticket header shows a colored dot next to the preview link:
- Green — preview is running
- Amber — preview is starting
- Red — preview is degraded
Running previews
Two surfaces show all running previews across your organization:
- Dashboard card — on the work dashboard, with the ability to jump to a preview or stop it directly
- Board header chip — shows the number of running previews on the board; click opens a popover with details
Both hide automatically when no previews are running.
Reset
The Reset button in the preview toolbar clears the cloned code and rebuilds the preview from scratch — on the branch it was started with (the default branch if you didn't pick one). This is useful when the preview is stuck on a stale state or a broken build has made the container unusable.
After reset, the preview reboots automatically.
Troubleshooting
| Symptom | Cause / fix |
|---|---|
| Repository section shows "No active GitHub integration" | The org has no GitHub integration — connect one under Settings → Integrations |
| Preview URL returns 403 | No valid session, or the preview belongs to another organization |
| Preview boots with an empty database | No per-ticket override and no project-default snapshot set — the image boots its own seed database |
| Changes to the database don't show up | The snapshot selection applies on the next boot — stop and restart the preview |